October decorating does not need a big budget. With the right dollar tree halloween crafts, you can turn plain jars, foam pumpkins, picture frames and plastic bowls into cozy, spooky-cute decor in an afternoon. Most projects below need only a few basic supplies, a hot glue gun and a little paint.
This guide groups 20+ ideas by type, so you can pick a project that fits your space, your skill level and your time. Every craft includes a supply list and simple steps.
Why Dollar Tree Halloween Crafts Work So Well
Dollar store DIY works because the raw materials are cheap, simple and easy to customize. A plain glass vase, a bag of faux pumpkins or a black plastic bowl becomes something new with paint, ribbon or a few cutouts.
- Low cost: you can mix and match items without worrying about waste
- Quick setup: most projects take under an hour, plus drying time
- Beginner friendly: no sewing, carpentry or special tools required
- Flexible style: go farmhouse cozy, witchy elegant or kid-friendly playful
[IMAGE 2: Budget Supply Flat Lay]
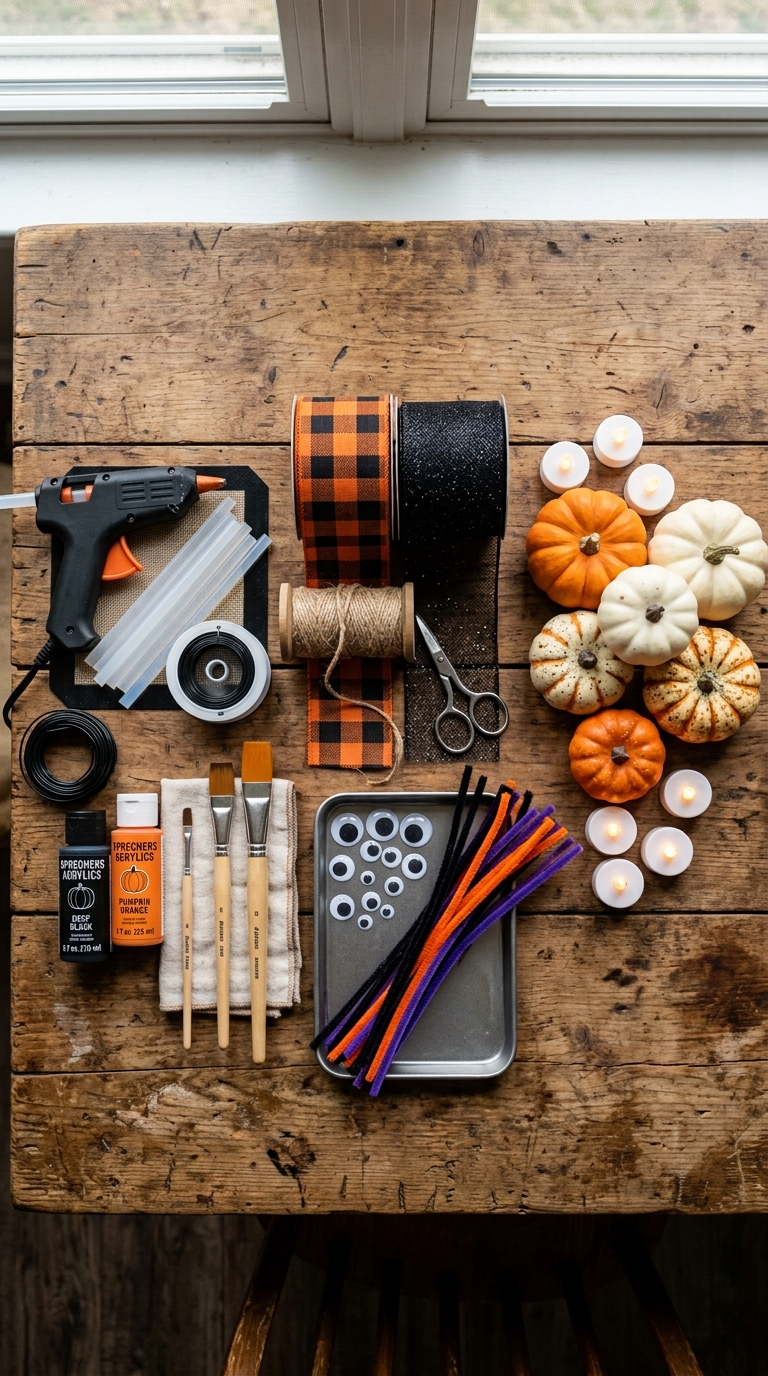
Basic Supply Kit for Almost Every Project
- Hot glue gun and glue sticks
- Black, orange and white acrylic paint
- Black spray paint (use outdoors or in a ventilated space)
- Jute twine and assorted ribbon (black, buffalo check, polka dot)
- Faux pumpkins, faux autumn stems and mini ghosts
- LED tealights or flameless candles
Tip: Dollar Tree stock changes by store and season. Check what is on the shelf first, then adapt the project to what you find.
Painted Jar and Vase Crafts
Glass jars are the most useful item on this list. They take paint well, hold LED lights beautifully and look good on any mantel or shelf.
1. Jack-O’-Lantern Vase Glow
Paint a clean glass vase orange, add a black jack-o’-lantern face, tie jute twine around the neck and fill the top with faux autumn stems. It gives a cozy farmhouse feel without any carving mess.
What you need: glass vase, orange acrylic paint, black paint or vinyl, jute twine, faux autumn stems
2. Skeleton Hand Potion Jar
Paint a jar matte black, add a “Pick Your Poison” label, wrap twine around the neck and arrange skeleton hands inside for a potion-shop look.
What you need: glass or plastic jar, black paint, skeleton hand picks, jute twine, label
3. Ghost Glow Mason Jar
Paint the outside with white or frosted glass paint, add two oval eyes and a long ghost mouth, attach a wire handle and drop in a battery tea light. It glows softly at night and feels sweet rather than scary.
What you need: mason jar with lid, white or frosted paint, black paint, wire handle, LED tea light
4. Pumpkin Candy Jar
Wrap the lower part of a glass jar in orange adhesive vinyl, attach a black pumpkin face, fill with candy and tie ribbon around the lid. Perfect for a treat station.
What you need: glass jar with lid, orange vinyl or paper, black face cutout, black-and-white ribbon, candy
5. Festive Bat Bouquet Mason Jar
Paint a mason jar black, add a Halloween label, then arrange faux pumpkins, leaves, berry stems, branches and a small bat on top like a bouquet.
What you need: mason jar, black paint, mixed faux pumpkins, fall leaves and stems, bat decoration, ribbon, label
Glowing Lanterns and Candle Displays
Warm light is what makes Halloween decor feel magical. Always use LED or flameless candles with paper, vinyl or fabric decorations.
6. Glowing Halloween Lantern Jars
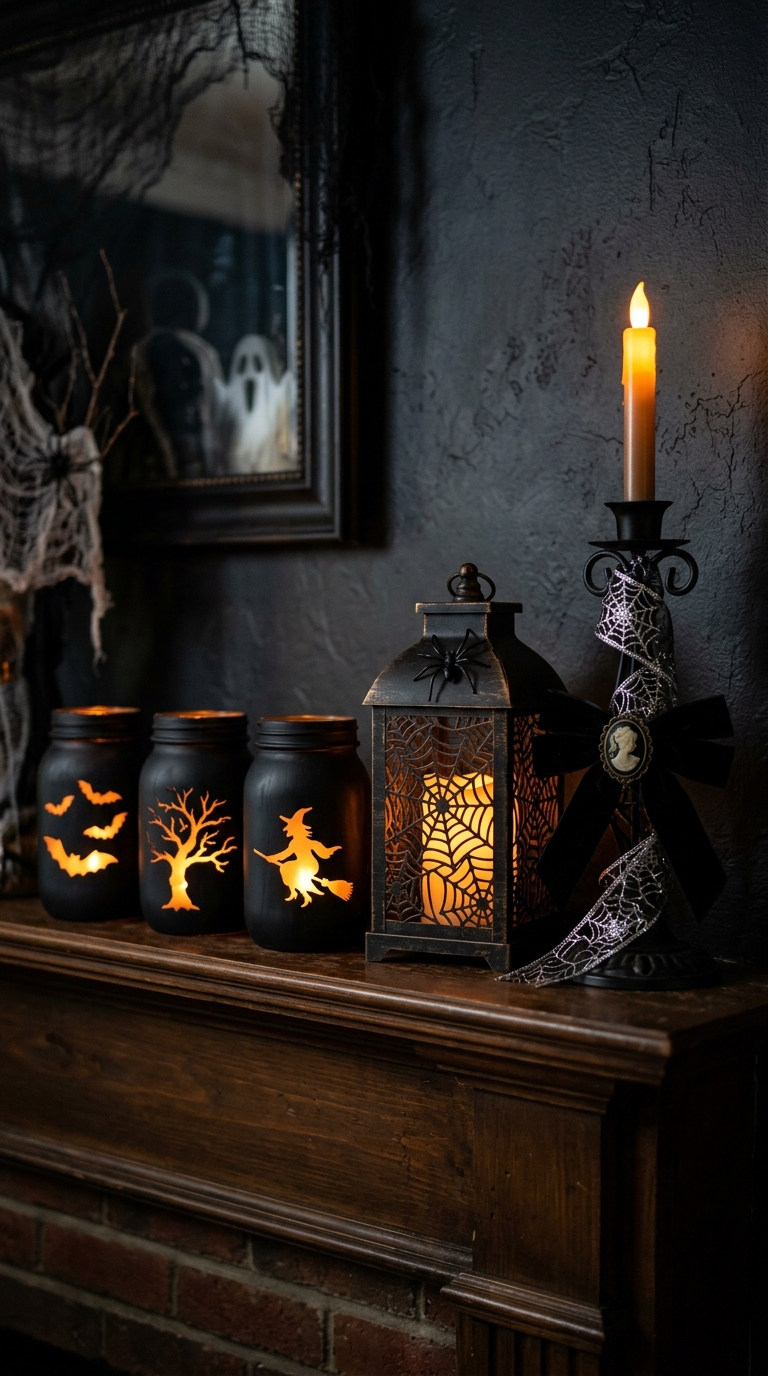
Paint jar exteriors black, line the inside or back with orange tissue paper or vellum, glue on silhouettes (bats, trees, pumpkins or a witch) and add a tealight. The dark shapes against warm light look striking on a mantel.
What you need: black acrylic paint, glass jars, orange tissue paper or vellum, silhouettes or decals, glue or Mod Podge, LED candles
7. Spiderweb Lantern Glow
Stretch spiderweb decoration across the glass panels of a black metal lantern, place a plastic spider on the front and set a flameless candle inside.
What you need: black metal lantern, spiderweb decorations, plastic spider, flameless candle
8. Webbed Candle Holder Chic
Wrap a black holder in spiderweb ribbon, add a wide black ribbon bow at the top and glue a black cameo embellishment in the center. This is the most elegant piece on the list.
What you need: black candle holder or jar, spiderweb ribbon, black ribbon, cameo embellishment, pillar or flameless candle, hot glue
Pumpkin Crafts
Foam, faux and wooden pumpkins are the easiest base for a quick, polished project.
9. Buffalo Check Pumpkin Charm
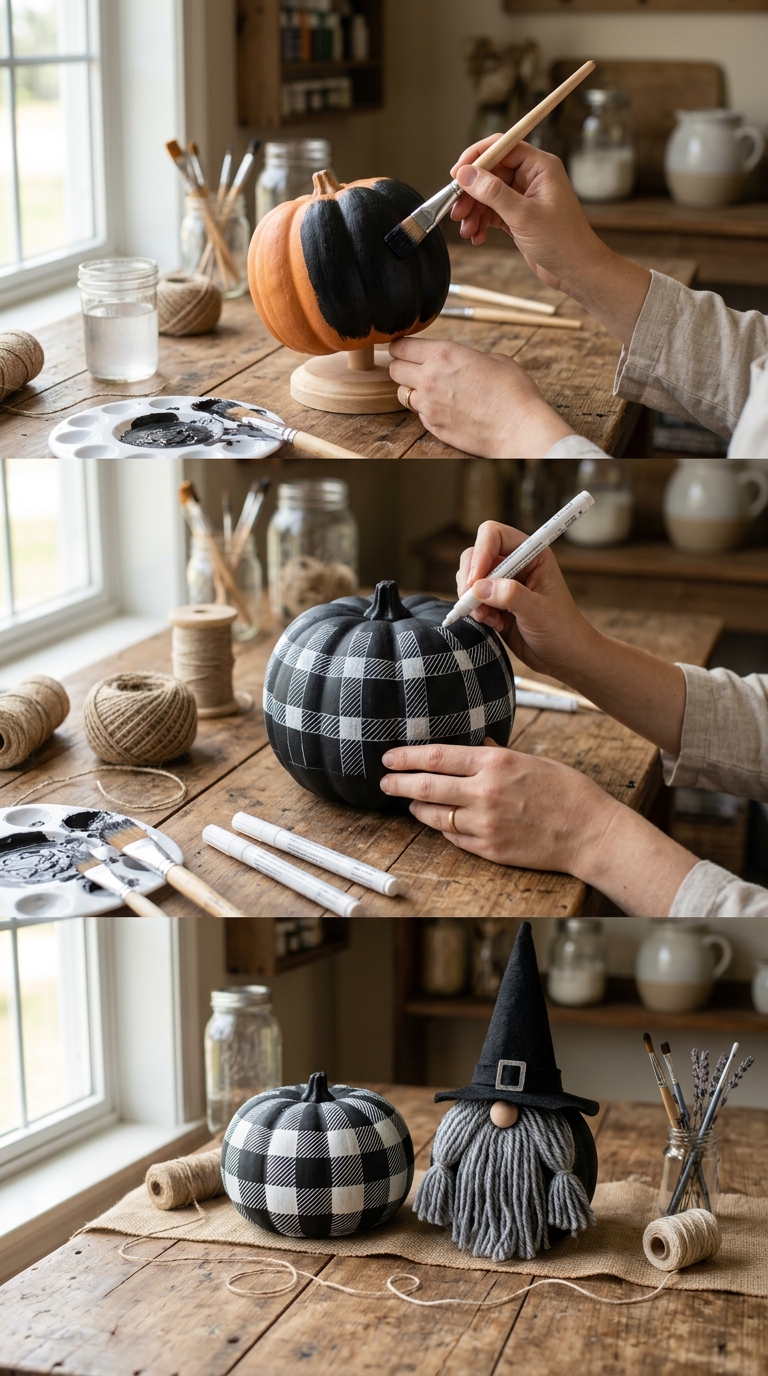
Paint a foam pumpkin black, let it dry fully, then add wide white vertical and horizontal lines for a buffalo check pattern. Wrap the stem with twine and tuck in a faux leaf.
What you need: foam pumpkin, black matte paint, white paint marker, twine, faux leaf pick
10. Witchy Pumpkin Gnome
Glue a black felt hat on a small faux pumpkin, add shaggy gray yarn hair, cut felt eyes, nose and mouth, then finish with an orange ribbon band and a wooden bead nose.
What you need: small faux pumpkin, black felt hat, gray yarn, orange ribbon, felt scraps, wooden bead, hot glue
11. Ribbon-Topped Pumpkin Smile
Paint a wooden pumpkin cutout orange, add black triangle features, paint the stem green and layer black, polka dot and buffalo check ribbon into a big bow.
What you need: wooden pumpkin cutout, orange and green paint, black paint or vinyl, three ribbon styles, glue gun
Door, Wall and Porch Decor
These projects make the biggest visual impact because guests see them first.
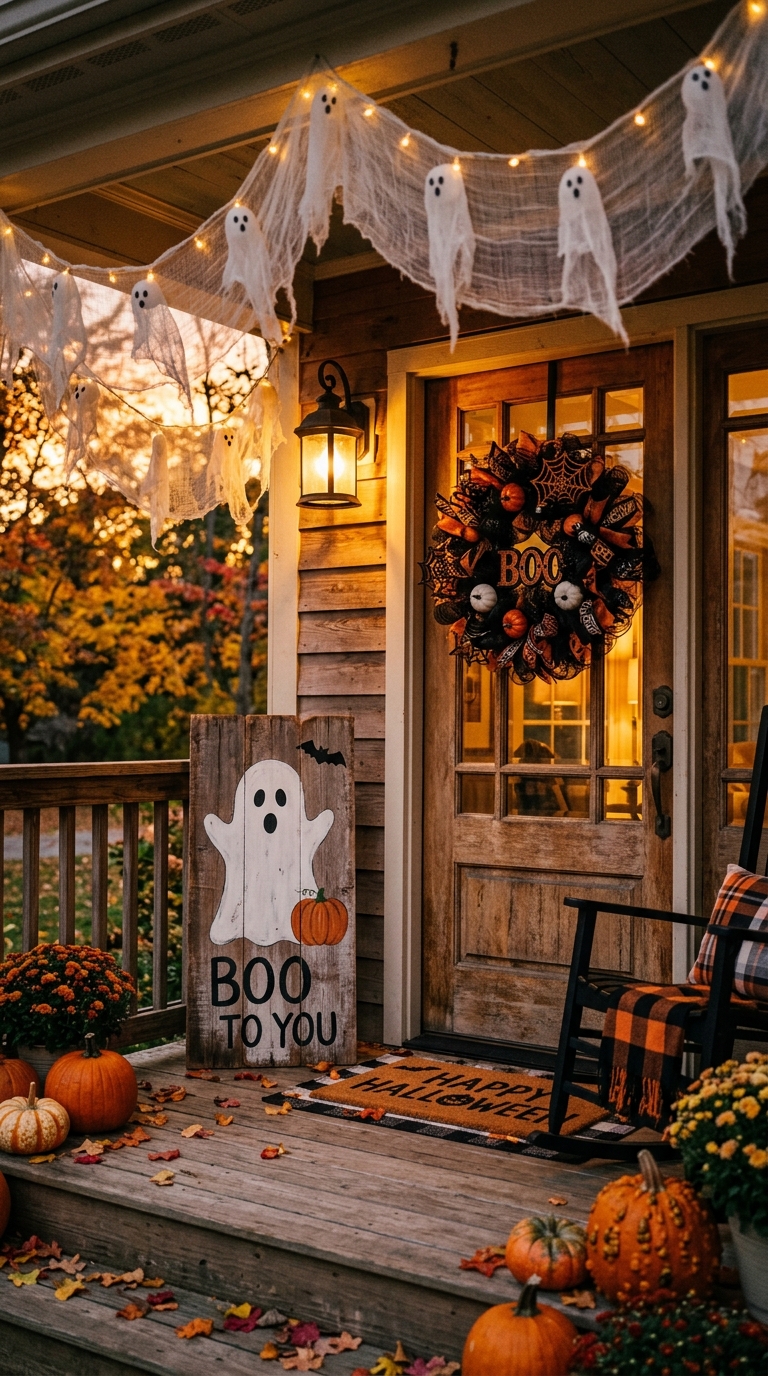
12. Webbed Mesh Wreath Glow
Wrap a wreath form with black mesh ribbon until full, tuck and secure soft loops, attach spider web cutouts in open spots and glue on mini pumpkins.
What you need: wreath form, black mesh ribbon, faux mini pumpkins, spider web cutouts, floral wire or hot glue
13. Rustic Ghost Porch Sign
Paint three wooden boards in mixed gray and brown tones, add a large white ghost across the center, attach a painted orange pumpkin at the bottom and finish with a small black sign, bat detail and twine hanger.
What you need: three wooden boards, orange, white, black, gray and brown paint, brushes, twine, glue
14. Ghostly Spider Web Frame
Place black cardstock inside a black picture frame, add a white ghost near the lower center, a paper web in the top corner and a small glitter spider.
What you need: black frame, black cardstock, white ghost cutout, paper web, glitter spider, glue or double-sided tape
15. Rustic Skeleton Wall Decor
Put burlap or cardboard inside a small wood frame, center a plastic skeleton, drape black mesh around the edges and add a twine bow.
What you need: small wood frame, plastic skeleton, black mesh fabric, twine, hot glue
16. Floating Ghost Garland Charm
Paint a face on a white foam ball, cut gauze or Halloween fabric into a long draping shape with uneven edges, attach it over the top and hang with cord.
What you need: white foam ball, white fabric or gauze, black paint or marker, glue, hanging cord
Tabletop Displays and Kid-Friendly Crafts
Trays and bowls let you style seasonal pieces in one spot and swap items year to year.
[IMAGE 7: Tabletop Displays and Kid-Friendly Crafts]
17. Tiered Boo Tray Display
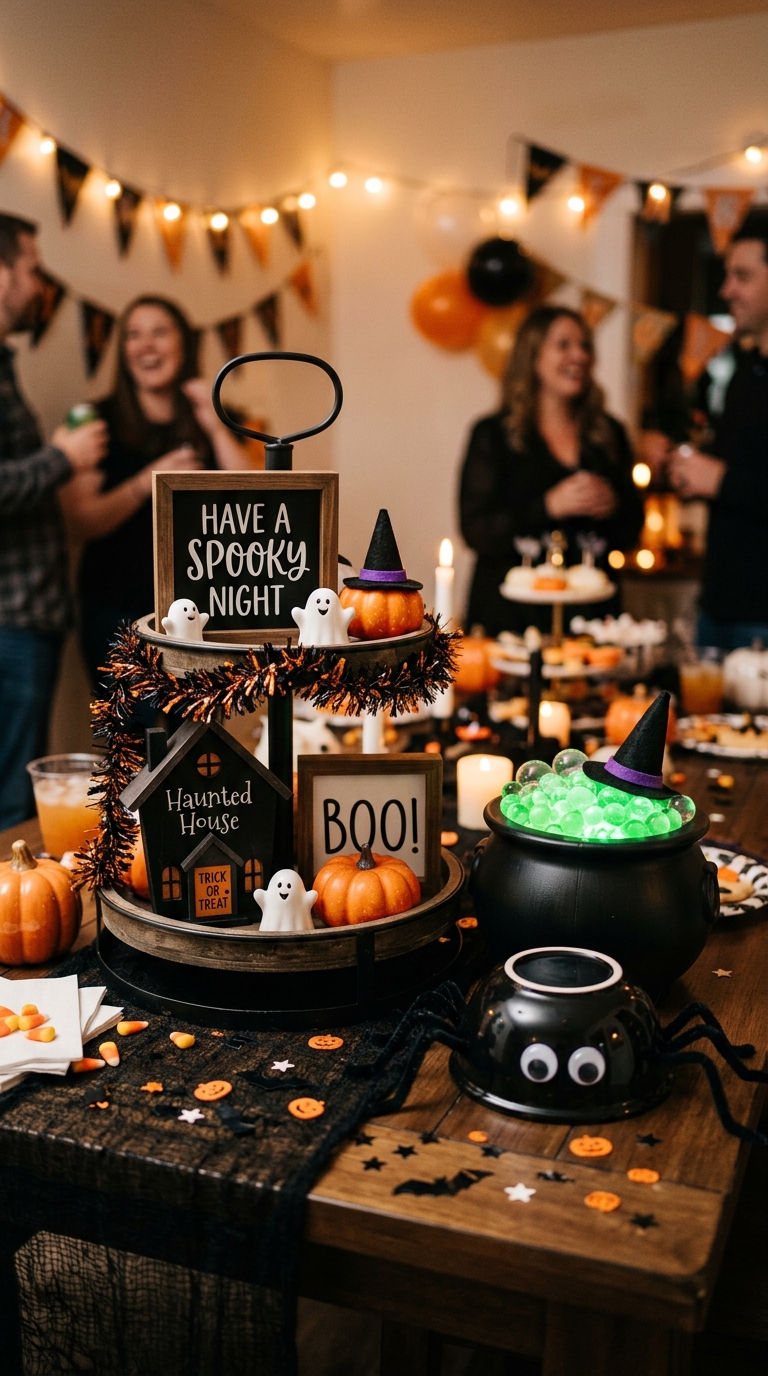
Stack two black tiered trays, add framed signs, mini pumpkins, ghost figurines, a black decorative house, faux greenery and black tinsel garland.
What you need: 2 black tiered trays, 2 small framed signs, 3 mini pumpkins, 2 ghost figurines, black decorative house, faux greenery, tinsel garland, buffalo check pumpkin
18. Spooky Tray Display Charm
Arrange a framed sign, faux pumpkin, black vase, mini haunted house and ghost cluster on a round black tray, then soften gaps with buffalo check ribbon and greenery.
What you need: round black tray, small framed sign, faux pumpkin, black vase, mini haunted house, ghost figurines, ribbon, faux stems
19. Witches Brew Cauldron Display
Fill a black plastic cauldron with mesh or faux moss, glue green marbles or beads so they look like bubbling potion, add a mini witch hat and a small sign.
What you need: black plastic cauldron, green clear marbles or beads, mini witch hat, sign or sticker, black mesh or faux moss
20. Creepy Cute Spider Bowl
Turn a black plastic bowl upside down, glue on bent pipe cleaner legs, add googly eyes and draw a tiny smile with white paint or marker. A great project to do with kids.
What you need: black plastic bowl, black pipe cleaners, googly eyes, white paint or marker, hot glue
Dollar Tree Halloween Crafts Compared
[IMAGE 8: Comparison and Analysis]
| Craft Type | Difficulty | Time (excl. drying) | Best For | Kid-Friendly |
|---|---|---|---|---|
| Painted jars and vases | Easy | 20 to 40 min | Mantels, shelves | With supervision |
| Lantern and candle crafts | Easy to medium | 30 to 60 min | Ambient lighting | Partly |
| Pumpkin crafts | Easy | 20 to 45 min | Tables, entryways | Yes |
| Wreath and wall decor | Medium | 45 to 90 min | Doors, walls | Limited |
| Tray displays | Very easy | 15 to 30 min | Centerpieces | Yes |
| Spider bowl and ghost garland | Very easy | 15 to 25 min | Party tables, kids | Yes |
Time and difficulty are general estimates and vary by skill and materials.
Key Takeaways and Practical Styling Tips
[IMAGE 9: Key Takeaways and Practical Application]
- Prep first: clean and dry glass before painting so the paint sticks
- Let paint dry fully between coats, especially on glass and foam
- Use LED candles with paper, tissue, mesh or fabric decor
- Repeat colors: black, orange and white tie mixed projects together
- Vary heights on trays and shelves so displays feel full, not flat
- Spray outdoors: use black spray paint in a ventilated area
- Mix textures: twine, mesh, buffalo check and felt add depth cheaply
Beginner Checklist
- Choose 2 or 3 crafts from different groups
- Buy the shared supplies once (paint, glue, ribbon, LED lights)
- Prep and paint everything in one session
- Assemble the next day after drying
- Style together on a tray or mantel
Conclusion: Start Small, Style Big

Dollar tree halloween crafts prove that spooky, cozy decor does not require a big spend. Start with one jar or one pumpkin, learn how the paint and glue behave, then build toward a full mantel, porch or tiered tray. Save your favorite pieces and you can refresh them next October with new ribbon or paint.
Frequently Asked Questions
1. What are the easiest dollar tree halloween crafts for beginners? Painted mason jars, buffalo check foam pumpkins, tray displays and the spider bowl are the simplest. They use basic paint, glue and ribbon with no special skills.
2. How long do dollar tree halloween crafts take to make? Most projects take 15 to 60 minutes of hands-on time, plus paint drying time. Wreaths and porch signs take longer.
3. What paint works best on glass jars? Acrylic paint or spray paint made for glass works well. Clean and dry the jar first, and apply thin coats for a smooth finish.
4. Are these Halloween crafts safe to light up? Use LED or flameless candles, especially with paper, tissue, vinyl, mesh or fabric decorations. Avoid real flames near these materials.
5. Can kids help with these DIY Halloween crafts? Yes. The spider bowl, ghost garland, pumpkin candy jar and tray displays are kid-friendly. Adults should handle hot glue and spray paint.